


Application / Registration Process
Full page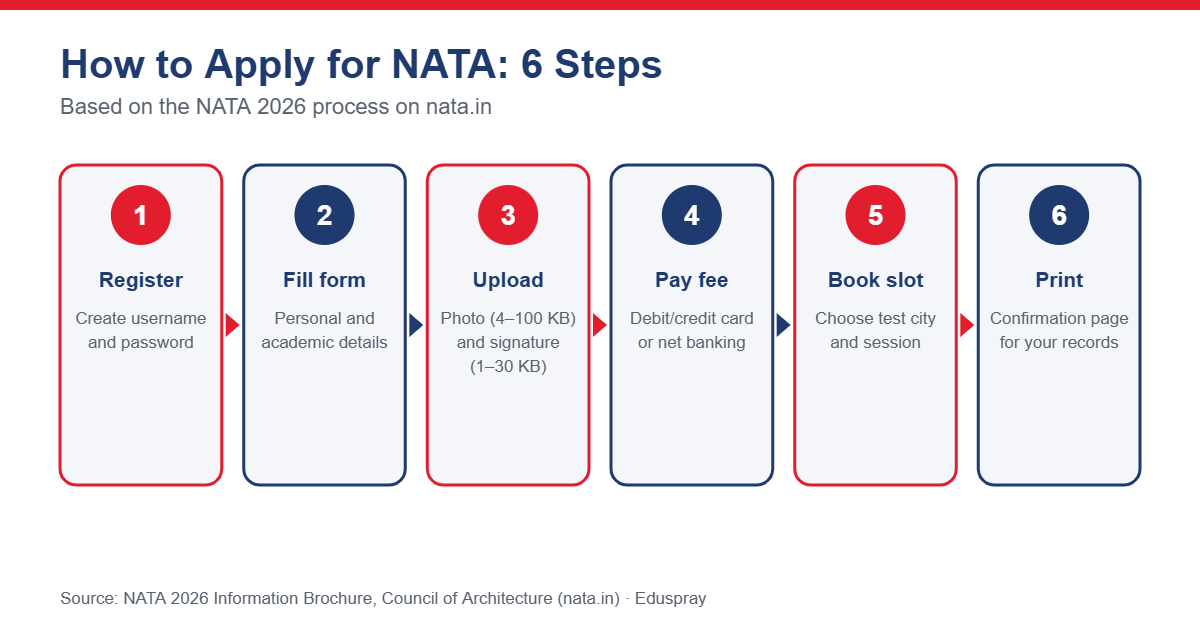
NATA 2027 status (checked 15 October 2026): The Council of Architecture has not yet released the NATA 2027 information brochure. Wherever this page refers to NATA 2026, the information is from the previous cycle and is given for reference only. It may change for 2027.
Key Takeaways
NATA registration is done only online at nata.in.
In 2026, candidates had just one chance to correct personal details.
The Appointment Card is issued only after booking a test city and session.
NATA 2027 Application Process
NATA registration is completed entirely online through the official website, www.nata.in. NATA 2027 registration has not opened yet. The steps below explain how the NATA 2026 application process worked, so that candidates can prepare in advance.
NATA Application Process: Step by Step
Step | Stage | What to do |
|---|---|---|
1 | Registration | Create a username and password on nata.in |
2 | Login | Log in and open the online application link for the current cycle |
3 | Personal and academic details | Fill in personal, contact and qualifying exam details |
4 | Document upload | Upload a photograph and signature in the prescribed format |
5 | Fee payment | Pay the application fee online through the payment gateway |
6 | Test booking | Select the test city/region and session |
7 | Confirmation | Print the confirmation page for your records |
Step 1: Register on the NATA Portal
Visit nata.in and create a login with a username and password. Use an active email ID and mobile number, as all communication from the Council is sent to these. The Council is not responsible if a candidate provides inactive contact details.
Step 2: Fill in the Application Form
Log in and enter your personal information, contact details and qualifying examination details carefully. In 2026, personal details could be edited until the document-upload stage.
Step 3: Upload Photograph and Signature
Upload a recent colour photograph (front view with both ears visible) and your signature in JPG/JPEG format within the prescribed file size and dimensions. See Application Fees and Required Documents for the exact specifications.
Step 4: Pay the Application Fee
Pay the fee online using a debit card, credit card or net banking. The fee is non-refundable.
Step 5: Book Your Test City and Session
Choose your preferred test city/region and session. The Council allots centres as far as possible according to preferences, subject to availability. The Appointment Card (admit card) is generated only after a city and session have been selected.
Step 6: Print the Confirmation Page
Print and keep the confirmation page. It is a record of your application and is not an entry pass to the exam centre.
NATA Application Correction
In 2026, candidates had only one opportunity to correct their personal details, and only during a designated correction window. Check every entry carefully before submitting.
Important Points While Applying
Submit only one application. In 2026, duplicate applications made by changing credentials were rejected without refund.
Keep your login credentials safe; you will need them for the Appointment Card, results and scorecard.
Providing false information can lead to cancellation of candidature.
Read the official brochure fully before filling in the form.
Pro Tip: Before starting the form, keep your photo (JPG, 4–100 KB) and signature (JPG, 1–30 KB) ready in the correct size.
Official Website
For the latest NATA information, refer to the official resources:
NATA website: https://www.nata.in
Council of Architecture: https://www.coa.gov.in
NATA 2026 information brochure (previous cycle): Download PDF
Candidates should verify every detail on the official website before registering or paying any fee.

Need Help with B.Arch Admissions?
Eduspray India can help students understand NATA requirements, shortlist architecture colleges and plan their admission applications. Use the College Predictor, compare colleges or explore top colleges in India.